
Last updated November 15, 2026
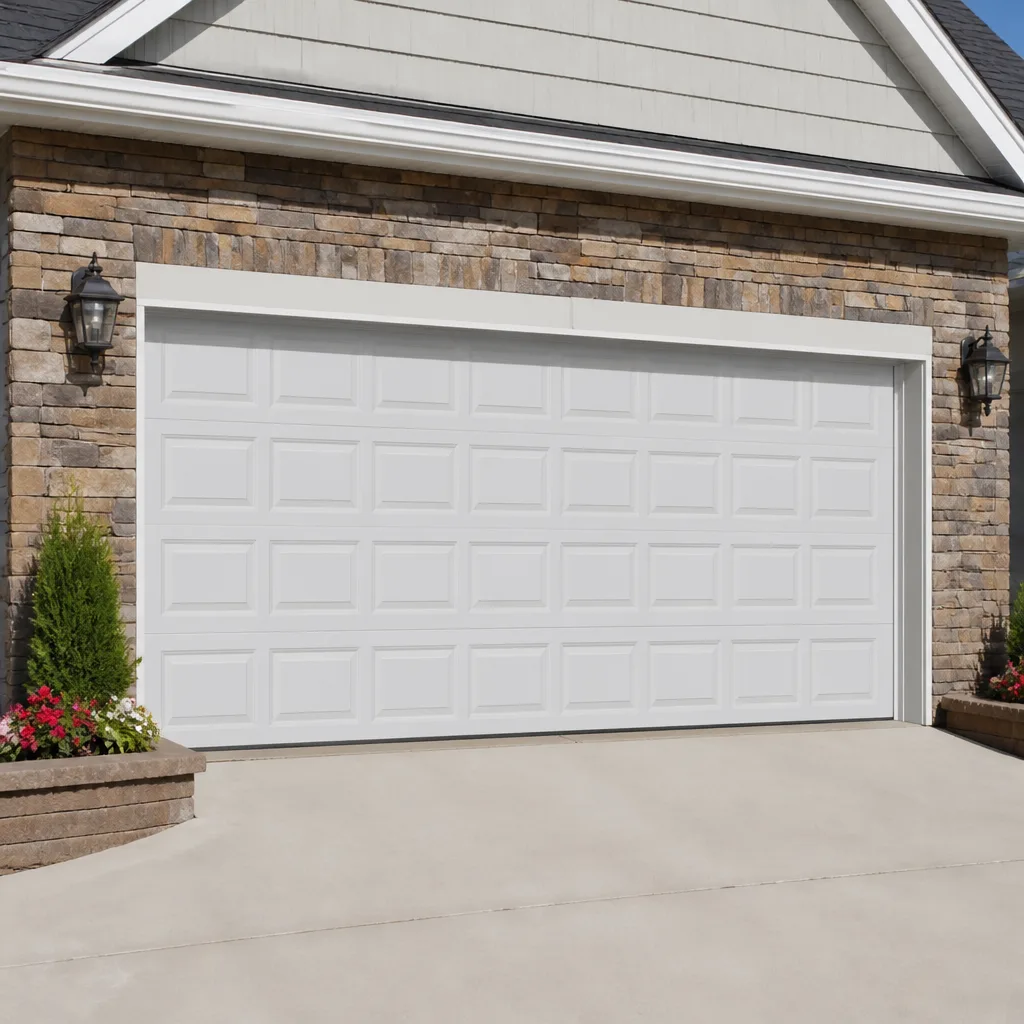 Raised-panel steel
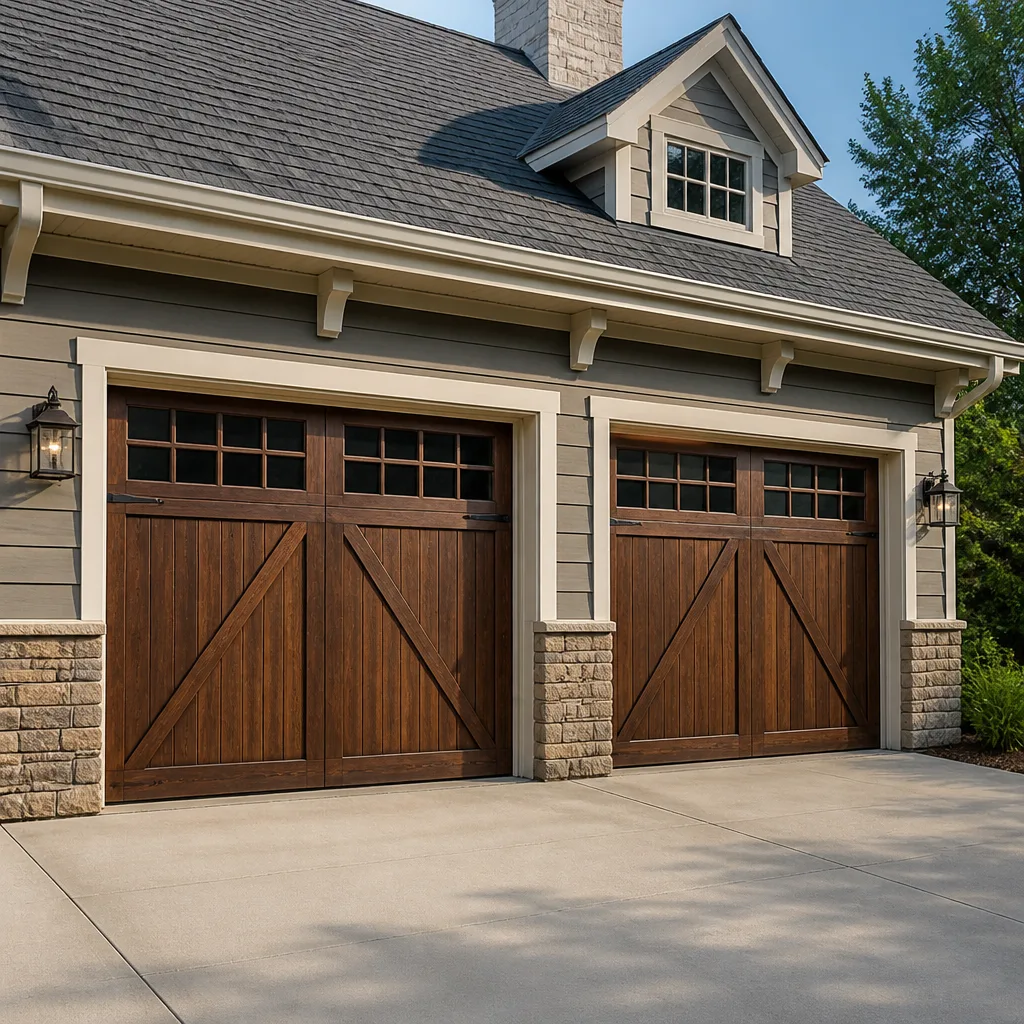 Carriage house
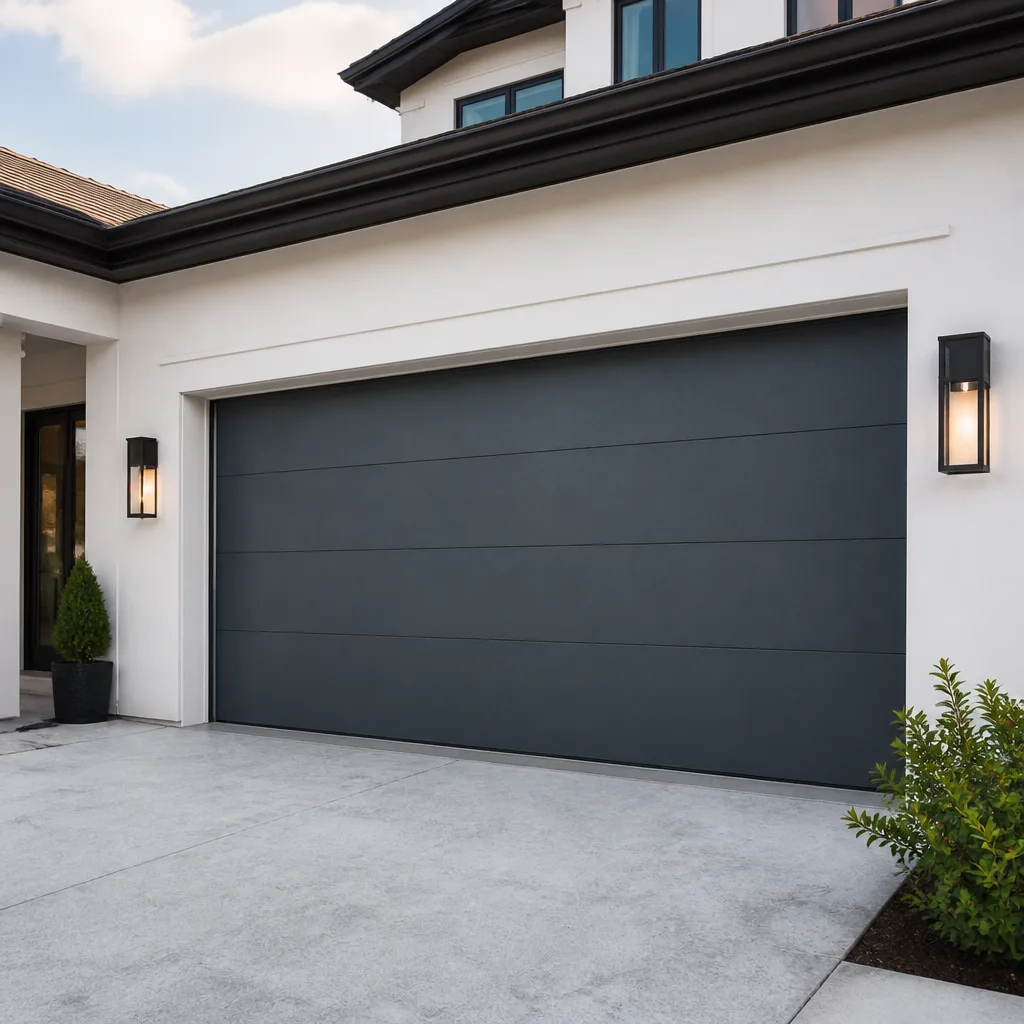 Modern flush
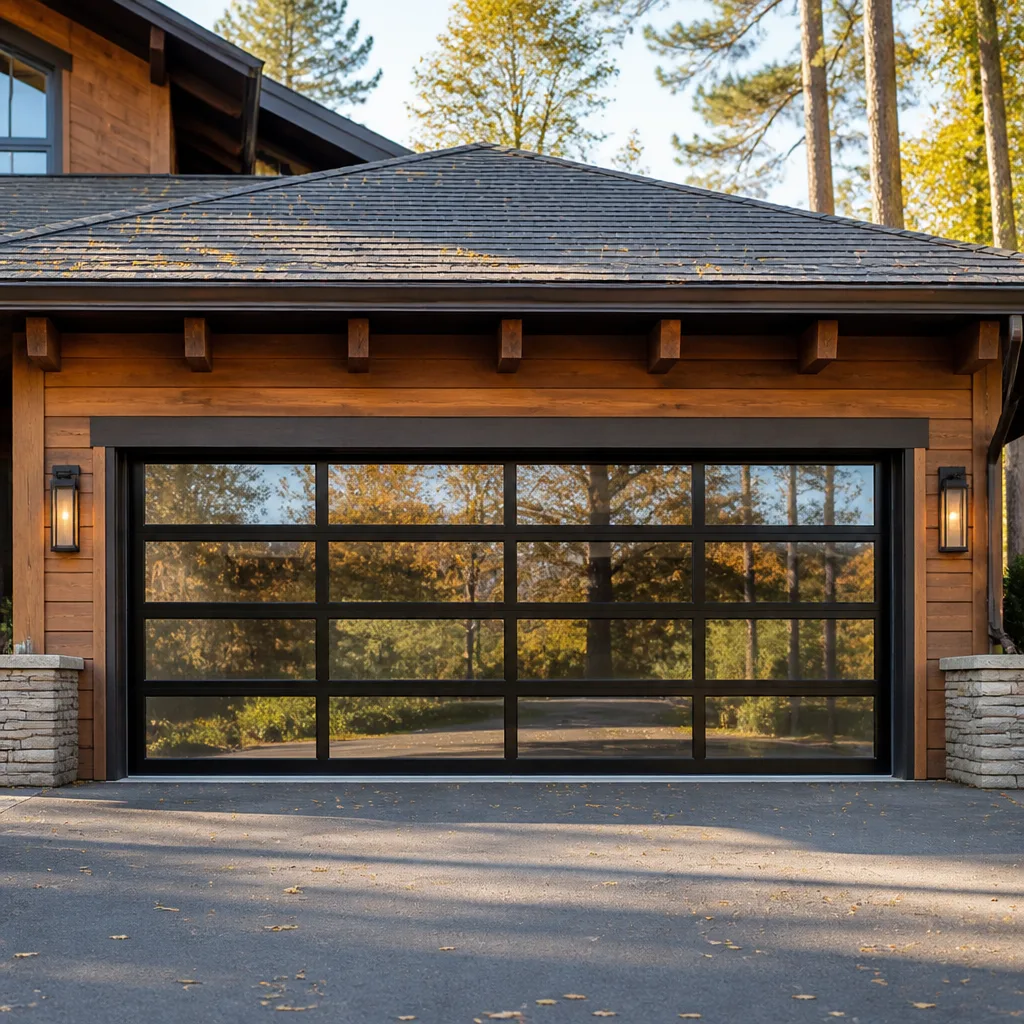 Full-view glass
 LiftMaster openers
 Chamberlain openers
Full 25-point door and opener safety check with every visit - springs, cables, rollers, tracks, and your LiftMaster or Chamberlain opener included
You get a price before we start. It does not change when the pro arrives.
Get your free estimateGarage Door Repair Maintenance Checklist for Columbia Homeowners
Most homeowners assume the spring is the first thing to fail on a garage door. In our experience across Columbia, that’s rarely true. The first failure is usually something cheaper and quieter: a photo-eye sensor nudged out of line by a rake leaning against the wall, a roller that’s dry from months of humidity, or a bottom seal that’s cracked and letting in damp air. None of those need a big repair, but all of them get worse if nobody looks. This guide ranks what actually fails first in Columbia’s climate, in the order we’d check it, with clear thresholds for when to handle something yourself and when to call a technician. You’ll finish with a seasonal log you can keep for years.
Quick Answer
A garage door maintenance checklist for Columbia should be checked in this order: photo-eye sensors, rollers and hinges, bottom seal, cable condition, spring balance, track alignment, then the opener’s force and travel settings. In Columbia’s humid summers and occasional freezing nights, the bottom seal and cables wear fastest, so inspect them at every seasonal check rather than once a year. Any frayed cable, uneven door travel, or snapped spring means stop and call a professional.
Styles & brands we work with
- Raised-panel steel
- Carriage house
- Modern flush
- Full-view glass
- LiftMaster openers
- Chamberlain openers
Table of Contents
- The Ranked Inspection Checklist: What Fails First in Columbia
- Step 1: Photo-Eye Sensors and Safety Reverse
- Step 2: Rollers, Hinges and Lubrication for Humid Weather
- Step 3: Bottom Seal and Cable Condition
- Step 4: Spring Balance and What to Leave Alone
- Step 5: Tracks and Opener Settings
- When to Call a Technician vs. Handle It Yourself
- A Printable Seasonal Log for Columbia Homeowners
The Ranked Inspection Checklist: What Fails First in Columbia
Generic maintenance checklists follow the manufacturer’s manual order, which is written for every climate at once. That order isn’t wrong, but it isn’t how doors actually break in Columbia. Our ranked sequence comes from what we get called about most often, ordered by how quickly a small problem turns into an expensive one.
Here’s the ranking, cheapest and most common first:
- Photo-eye sensors. Knocked out of alignment by garden tools, lawn equipment, or a stored cooler. Costs nothing to reposition.
- Rollers and hinges. Dry out in Columbia’s summer humidity, then squeal and wear flat. Cheap to lubricate, moderate to replace.
- Bottom seal. Cracks and shrinks with heat and damp. Inexpensive part, but a failed seal lets water and pests in.
- Cables. Corrode and fray faster in humid air. A frayed cable is a hard stop, no exceptions.
- Spring balance. Torsion springs lose tension over time. A snapped spring is sudden and dangerous.
- Track alignment. Usually a symptom of a loose bracket or an impact, not a cause.
- Opener settings. Force and travel limits drift; the door still works but the safety reverse may not.
Why does the order matter? Because a homeowner who checks only the springs once a year misses the two cheapest, most frequent failures. That sensor gets bumped in a Columbia garage more often than you’d guess. A door that won’t close and a sensor that’s been nudged an inch out of line look identical from the driveway, but one is a 90-second fix and the other is a service call.
Run this ranking at every seasonal check. It takes about fifteen minutes and catches the small stuff before it becomes the expensive stuff. When something on the list sits past its threshold, that’s when our garage door repair team gets involved.
Step 1: Photo-Eye Sensors and Safety Reverse
The photo-eye sensors sit about six inches off the floor on each side of the door, and they’re the single most common cause of a door that reverses for no obvious reason. A door that goes down partway and comes back up, or won’t close at all, is usually a sensor problem, not a door problem. Check this first, every time, before anything else.
The test is simple and safe. With the door open, press the wall button and watch. If the door starts down and reverses on its own, one of the sensors likely isn’t seeing the other. Look for:
- A sensor lens with dust, cobwebs, or a film of grime on it. Wipe with a soft cloth.
- A sensor that’s been knocked out of line by a trash can, a garden tool, or a bicycle.
- Sunlight hitting one sensor lens directly, which can blind it. A small shade or hood fixes this.
- A loose wire at the back of the sensor, especially after a garage clean-out.
To realign, loosen the wing nut on the bracket and aim the sensor so its small indicator light is steady. Both sensors should show a steady light when they’re lined up. Then run the safety reverse test: place a roll of paper towels or a piece of scrap wood flat on the floor under the closed door’s path and press the button. The door should contact the object and reverse. If it presses down and stays, the opener’s force setting needs attention, and that’s a call-a-technician item.
Repeat the safety reverse test after any sensor adjustment. It’s the one test we’d never skip on any door, on any brand, whether it’s a Chamberlain unit or a Genie. If the reverse doesn’t work after adjustment, stop using the door and call for service. This is the failure that matters most, and it’s why we check it first on every visit.
Step 2: Rollers, Hinges and Lubrication for Humid Weather
Columbia’s humidity is hard on the moving parts. Steel rollers and hinges dry out, then rust, then squeal and bind. A binding roller pulls the door slightly off its track and wears the hinge points, so a lubrication problem becomes an alignment problem if you wait. This step is the cheapest one on the list and the one most homeowners skip.
What to use, and what not to use
In high-humidity environments, the wrong lubricant causes more harm than none. Here’s the short list:
- Use: a garage door or silicone-based spray lubricant designed for the purpose. It stays put and won’t attract grit.
- Use: a lithium grease on the hinges if they’re already stiff.
- Avoid: WD-40 as a long-term lubricant. It’s a penetrant, not a lubricant, and it attracts dust that gumms up rollers.
- Avoid: cooking spray or generic household oil. Both break down fast in heat and leave a sticky residue.
- Avoid: over-lubricating the tracks. Tracks should be wiped clean and left dry, not greasy.
The lubrication routine
- Wipe the tracks with a damp cloth to remove dust and grit. Leave them dry.
- Spray the hinge pivot points on each side of the door, one hinge at a time.
- Spray the roller stems, not the roller wheels. The stem is where the motion happens.
- Wipe any drips off the door panels and the floor before they stain.
- Open and close the door a few times to work the lubricant in, then check for a smoother, quieter run.
Nylon rollers on newer Clopay or Amarr doors need less lubrication than older steel ones, which is one small reason newer doors run quieter. If your rollers wobble in their brackets or look flat on one side, lubrication won’t fix it. That’s a roller replacement. The Clarity Garage Door Service team keeps the whole system in view, so a roller check doesn’t become a guess about the opener.
Step 3: Bottom Seal and Cable Condition
The bottom seal and the cables are the two wear items most sensitive to Columbia’s climate, and they’re the ones most homeowners under-inspect. The bottom seal holds back rain, insects, and the occasional snake, and it takes the full force of a summer heat cycle. The cables are under constant tension and corrode fastest in humid air. Check both at every seasonal pass.
Checking the bottom seal
Kneel down with a flashlight and run a finger along the underside of the seal. Look for:
- Cracks, splits, or a seal that’s shrunk away from the door edges.
- A seal that’s stiff and hard rather than pliable.
- Daylight under the closed door, which means it’s not sealing against the floor.
- Mold or moss on the underside, common in damp garages in Columbia.
A cracked seal is a simple replacement and worth doing before the rainy season. It’s also the part that keeps pests out, so a seal with a gap is an open invitation.
Checking the cables
The lift cables run from the bottom corners up to the drum above the door. They’re under high tension, so inspect them by eye only, never by hand. Look for frayed strands, kinks, rust, or a cable that’s come off its drum. A frayed cable can snap without warning and whip with force. That’s a stop-and-call situation, not a watch-it situation.
On this correction, we want to be clear: cables and springs are the two parts of a garage door that can seriously injure someone. Cable work, spring replacement, and drum adjustments belong to a trained technician with the right winding bars. What you can do is catch a frayed cable early by looking. If it looks worn, call for service on the same day you spot it. Our repair service covers cable replacement and the balancing that goes with it.
Step 4: Spring Balance and What to Leave Alone
Springs are the loudest part of the checklist, and the one we handle for you. A torsion spring above the door or a pair of extension springs along the tracks does the heavy lifting; the opener just guides the door. When a spring loses tension, the door gets heavy and the opener strains. When a spring breaks, it’s typically a sharp report and a door that won’t lift. Never test a spring by hand and never try to adjust the tension yourself.
The safe test is a balance check, with the door disconnected from the opener. Here’s how a technician does it, and what you can watch for at home:
- Pull the red manual release handle to disconnect the door from the opener. Do this with the door fully closed.
- Lift the door by hand to about waist height. It should lift with moderate effort.
- Let go gently. A balanced door stays put at any height. A door that drops fast, or a door that’s very hard to lift, is off balance.
- Reconnect the door before using the opener.
If the door won’t hold its position, or lifting it takes real effort, a spring is worn or the cables need attention. That’s a call. On the flip side, a snapped spring, a spring with a visible gap in the coil, or any loud bang followed by a door that won’t open is an immediate stop. Don’t keep pressing the open button; the opener will strain and may damage itself.
Torsion springs on premium doors like a Clopay or Amarr model are matched to the door’s weight, so a replacement has to match the cycle life, not just the size. We check that match on every spring call. This is not a DIY job, full stop. Save the inspection for a visual look and leave the winding to a professional.
Step 5: Tracks and Opener Settings
Tracks and opener settings sit at the bottom of the ranking because they usually fail as a symptom, not a cause. A door that’s hitting the track on one side is usually riding a bound roller or a loose bracket. A door that’s slamming down is usually running too high a force setting. Fix the cause first, then check the track and opener, and everything lines up.
Tracks
Stand inside the garage and sight down each track. They should be straight and parallel to the door line. Look for dents, a track bracket that’s pulled loose from the wall, or a bend near the curve. A small bend can be gently straightened, but a dented track or a bracket that won’t hold needs replacement. Never use a hammer on the track. It makes the bend worse and can pinch the rollers.
Opener settings
On most openers, there are two settings that matter: force and travel. The force setting controls how hard the opener pushes before it reverses. The travel setting tells it where to stop. If the door reverses partway up, or pushes down and doesn’t stop, the settings or the safety reverse need attention.
- Check the safety reverse with the paper towel test from Step 1, every season.
- Listen for strain on the opener when the door lifts. A groaning opener often means a heavy door, not a bad opener.
- Watch the door travel to the open position. It should stop smoothly at the same height each time.
- Check the manual release handle. It should pull easily and reconnect cleanly.
Smart and connected openers from LiftMaster and Chamberlain have app-based diagnostics that can tell you when the force setting is off, but a lot of Columbia homes still run legacy Genie or Craftsman units with none of that. Those are exactly the openers where a manual check pays off. If the opener seems to be the problem after the door and tracks check out, our garage door opener repair team handles every brand, including the Wi-Fi models a general handyman often can’t diagnose.
When to Call a Technician vs. Handle It Yourself
The split is simple: anything under tension, under load, or electrical belongs to a technician. Anything you can see, wipe, test, or lubricate with the door at rest belongs to you. Here are the thresholds we use.
Handle it yourself
- Sensor alignment. Loosen the wing nut, aim the light, tighten. Ninety seconds.
- Lubrication. Rollers, hinges, and pivot points with the right spray. The tracks stay dry.
- Wiping tracks and sensors. Dust and cobwebs are a home fix.
- Cleaning and inspecting. A flashlight look at seals, cables, and tracks is always yours to do.
- Testing the safety reverse. The paper towel test is safe and worth running monthly.
Call a technician
- Any frayed, kinked, or rusted cable. Cables are under high tension. No exceptions.
- A snapped or visibly damaged spring. Never touch a spring, even a broken one; it can still be under load.
- A door that’s off balance after you release it from the opener.
- Track damage you can’t straighten by hand, or a loose bracket that’s pulled out of the wall.
- Opener force or travel settings that won’t hold after adjustment, or an opener that won’t reverse.
- A door that won’t close and won’t stay up after a sensor and balance check.
If you’re on the fence, that’s the point to call. We’ll tell you exactly what’s wrong before we touch anything, so you’re not paying for a repair you didn’t authorize. Our technicians have up to 8 years of experience, and the diagnosis is the same whether you’re near downtown Columbia or out in the suburbs. Ask for a free estimate, and we’ll walk through what you found before we quote the job. Fast dispatch is available from 7am to 7pm, Sunday through Friday.
A Printable Seasonal Log for Columbia Homeowners
A seasonal log is the single best thing you can do for a garage door, because wear is gradual and memory is not. Instead of a vague sense that the door “seems louder,” you’ll have a dated record of what you checked and what changed. This matters most in Columbia, where a humid summer and a freezing January stress the seal and cables in different ways. Log both, and you’ll spot the trend.
Here’s the log we recommend. Print it, keep it on a clipboard by the door, and write in pencil:
Quarterly log (four passes a year)
- Date of the check.
- Sensor test: pass or fail, plus any realignment notes.
- Rollers and hinges: lubed, replaced, or OK.
- Bottom seal: pliable, cracked, or replaced.
- Cables: visual only. Frayed, kinked, or OK.
- Balance check: holds at half-height or not.
- Tracks: straight, bent, or bracket loose.
- Safety reverse: passes or fails.
- Opener notes: noisy, slow, or fine.
Annual log (one deeper pass)
- Spring condition: visual check for gaps or rust, not a hand test.
- Door panel condition: dings, rust, or paint lifting.
- Opener brand and model: LiftMaster, Chamberlain, Genie, Craftsman, or another brand, for service records.
- Any professional service: date and what was done.
The value is in the comparisons. If the door was quiet in June and loud in September, you’ll see it in the log and can lubricate earlier next year. If the seal was pliable in November and cracked in March, you’ll know the winter cold is the stressor. Four passes a year is enough for most doors in Columbia, with the deep pass in the cooler season before summer heat arrives.
Common Mistakes to Avoid
We see the same handful of errors on Columbia doors, and most of them make a small problem bigger. Here are the ones to watch:
- Reaching for WD-40 as a fix-all. It’s a penetrant, not a lubricant. On rollers and hinges it attracts grit and gumms the mechanism up, so you end up replacing parts that only needed oiling. Use a purpose-made garage door or silicone spray instead.
- Testing a spring by hand. People try to lift a door and feel whether the spring “seems strong,” and that’s how injuries happen. The safe balance check disconnects the door and lifts it at waist height; anything beyond that is a technician’s job.
- Ignoring a small cable fray. A single frayed strand can turn into a full snap. In our experience Columbia homeowners put this off because the door still opens. That’s the mistake. A cable check is visual and quick, and a frayed cable means call on the same day.
- Greasing the tracks. The tracks should be wiped clean and left dry. Grease on the tracks collects dust and grit and actually increases friction. Lubricate the rollers and hinges, not the rails.
- Bumping the sensor and living with it. That snow shovel or lawn mower that leans against the wall by the door gets moved and never put back. A sensor that’s been nudged but the door still closes is a trap. Test the safety reverse monthly, not yearly.
- Letting the bottom seal crack in summer and waiting for winter. A cracked seal lets in water and pests through the wet months. Replacing it in the cooler season, before the summer heat, is cheaper and dries faster. Waiting just means a damp garage through the rainy stretch.
- Forcing the opener through a heavy door. If the door is hard to lift by hand, the opener will strain every time. The fix is a spring or cable issue, not a stronger opener. Pushing through it wears out the opener’s gears too, so you end up paying for both repairs.
See the difference
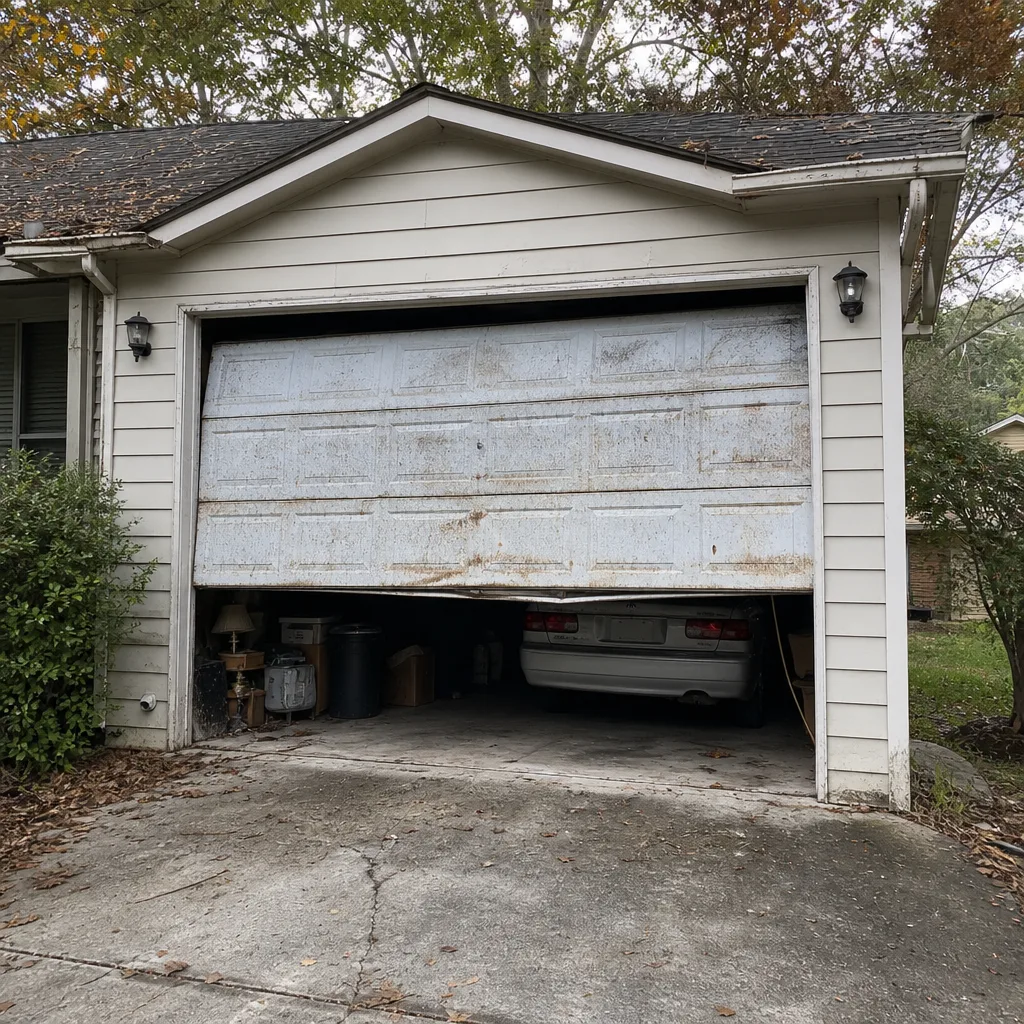 Before
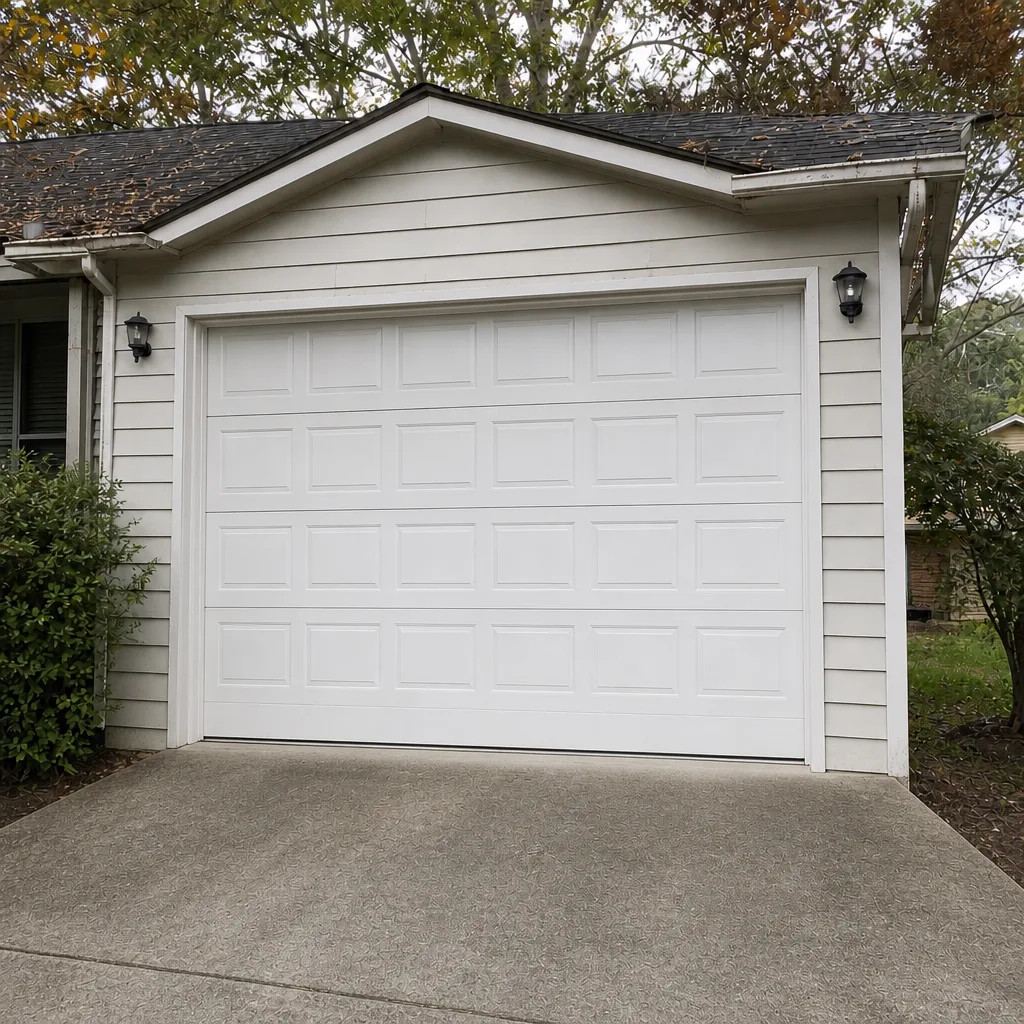 After
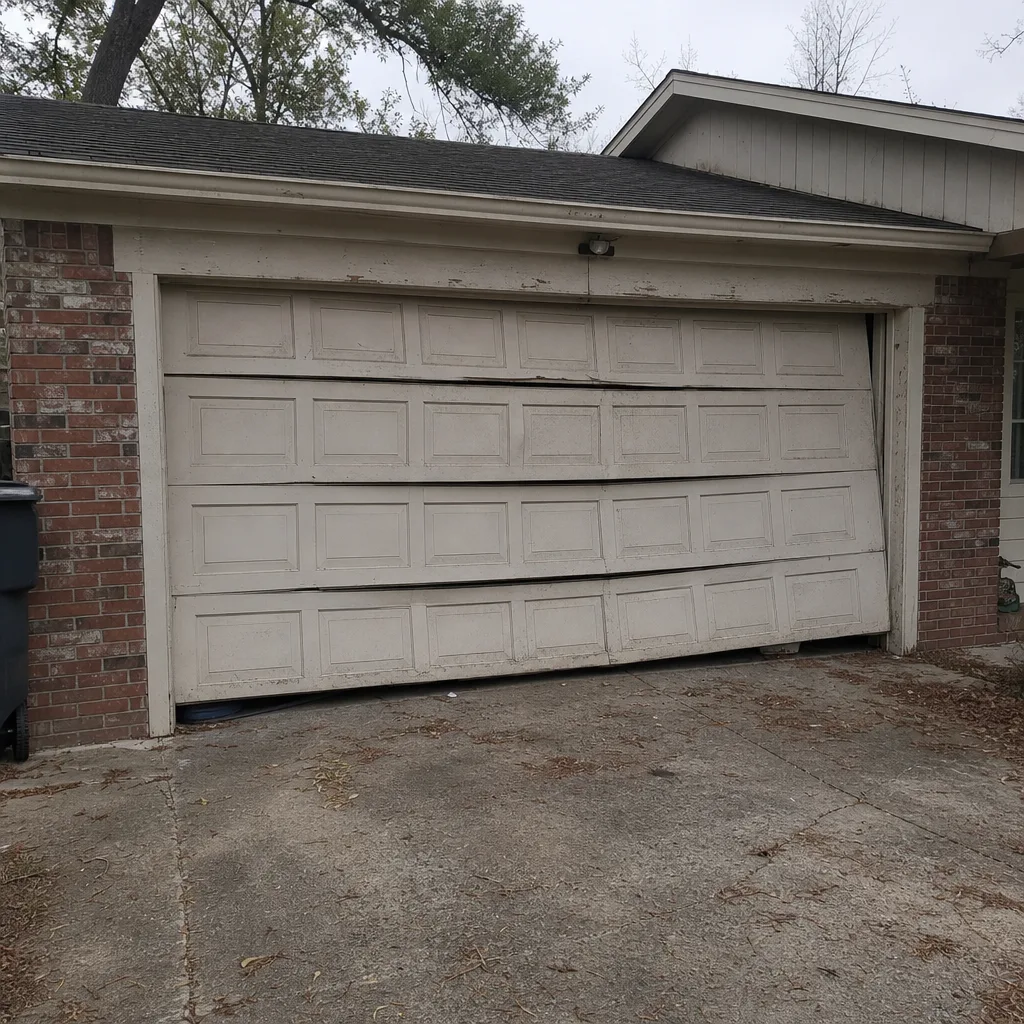 Before
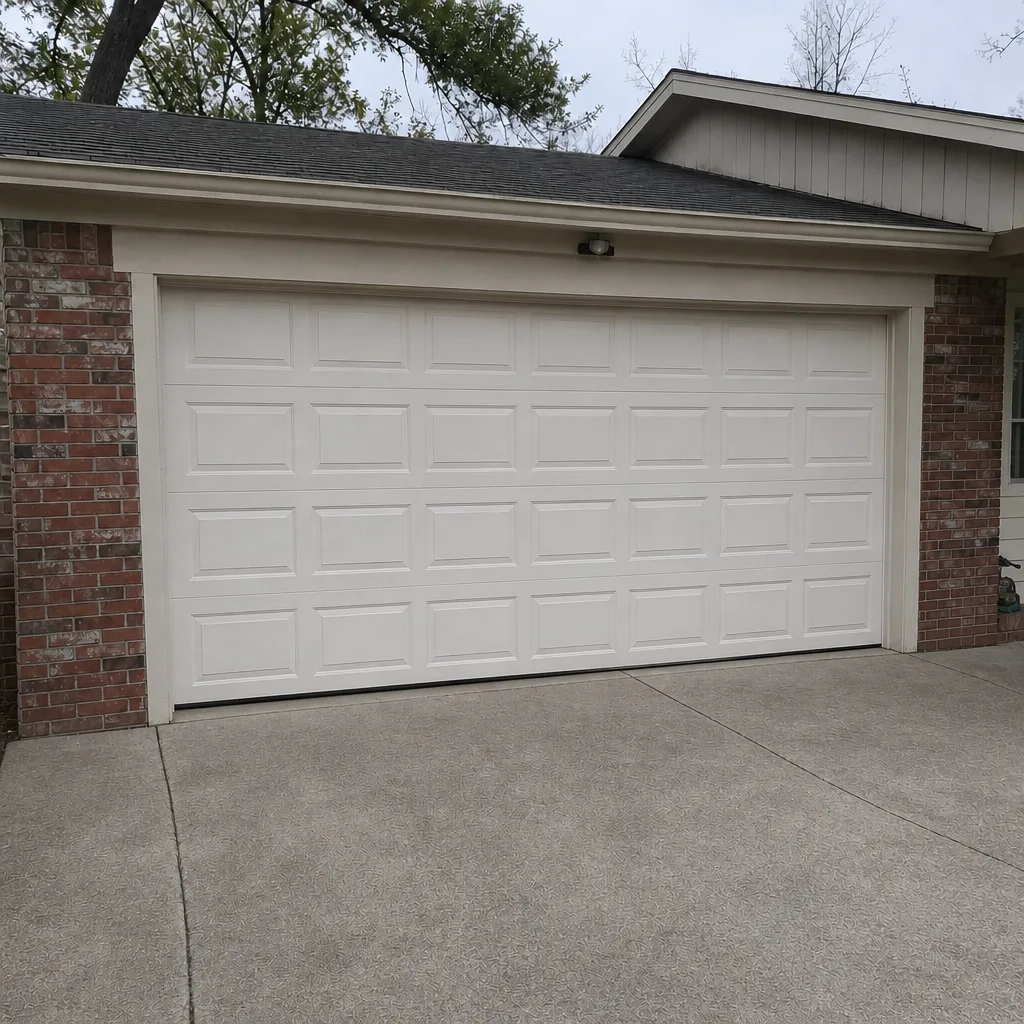 After
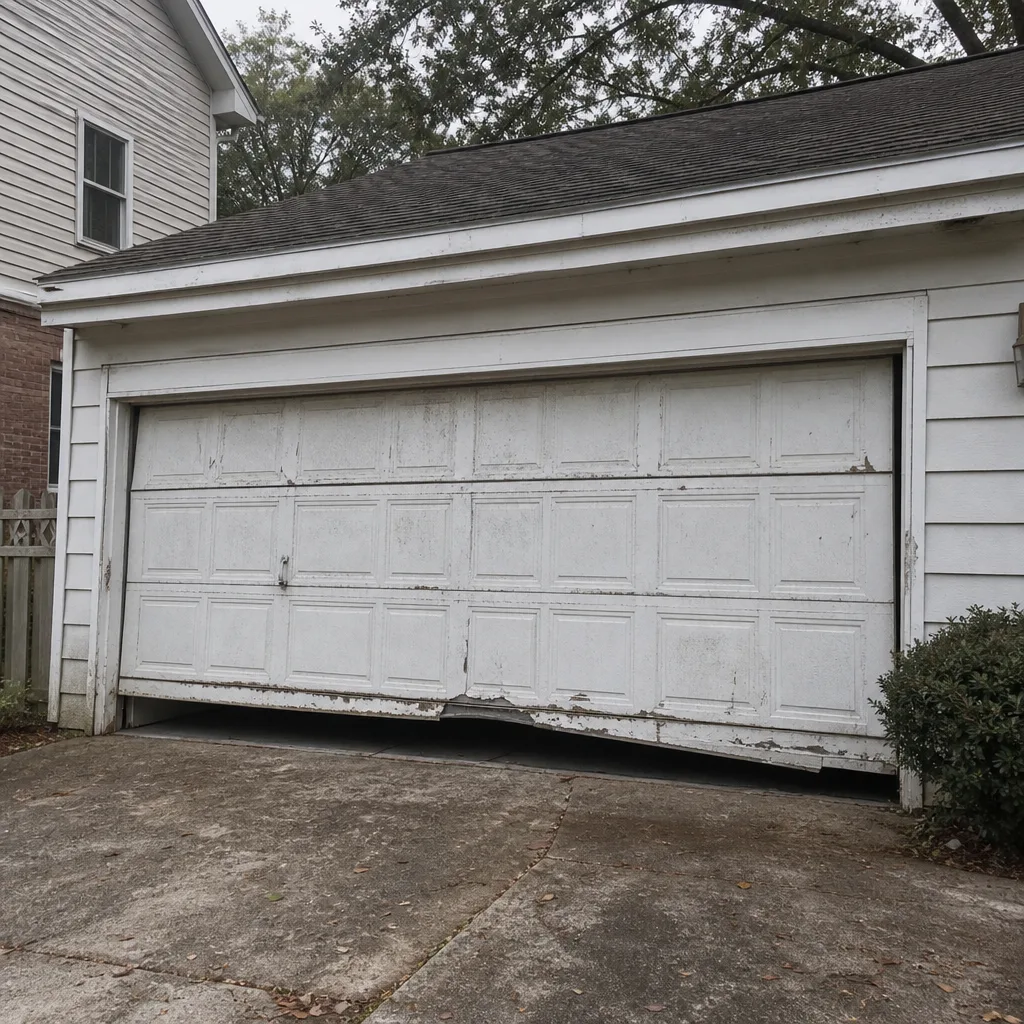 Before
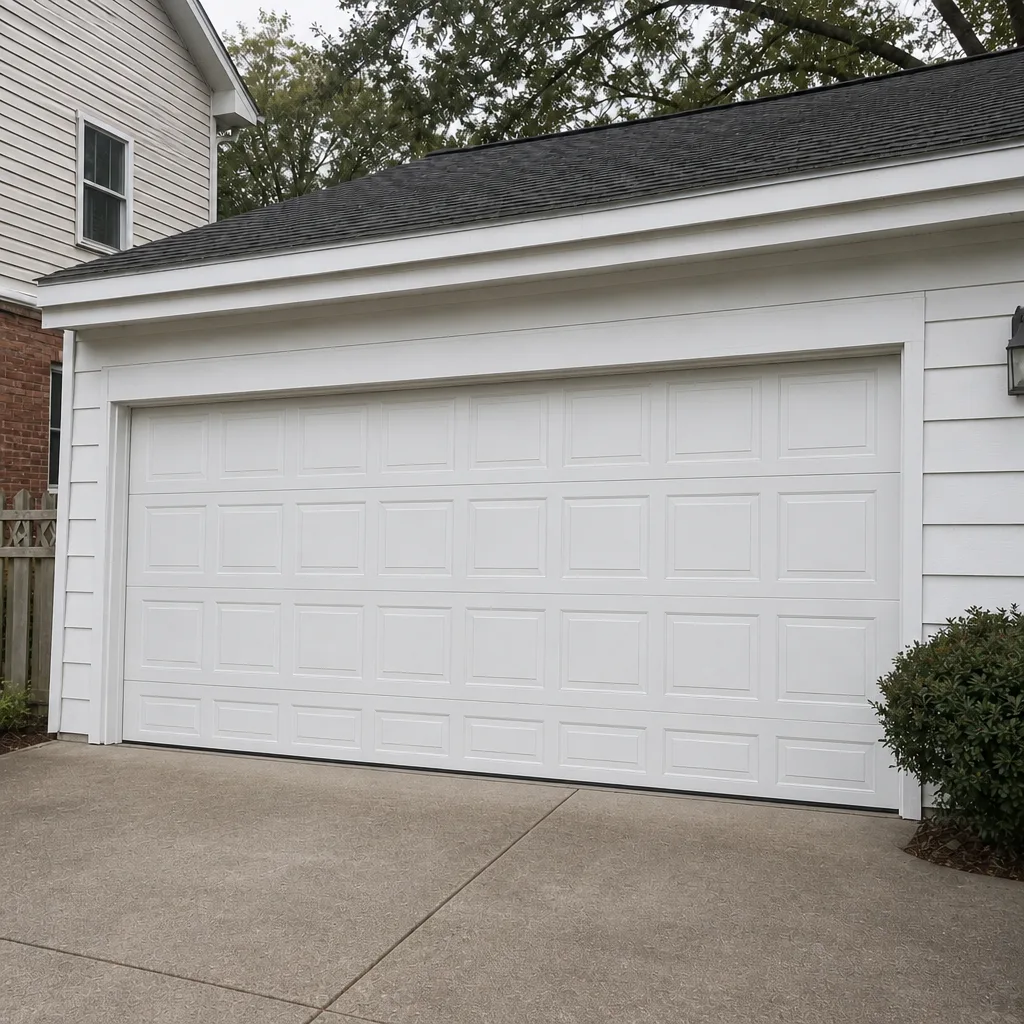 After
When to Call a Professional
Call a professional the moment anything on this checklist involves tension, load, or electricity, and stay off the door until it’s checked. The specific scenarios that mean a call: a snapped or visibly damaged spring, a frayed, kinked, or rusted cable, a door that won’t hold its position at waist height when disconnected, a track that’s bent or a bracket pulled out of the wall, an opener that won’t reverse after the safety test, and a door that’s jarred off its tracks. If you’re unsure, call. A free estimate settles it, and nobody gets hurt guessing.
Clarity Garage Door Service offers free estimates in Columbia; call (833) 391-2958. We answer 24/7, and fast dispatch runs from 7am to 7pm, Sunday through Friday. The written estimate is the price, and you’ll see exactly what’s wrong before any work is authorized.
Frequently Asked Questions
Check it four times a year, once per season, plus a monthly safety reverse test. In Columbia’s climate, the bottom seal and cables wear fastest, so those two items deserve a look at every seasonal pass rather than once a year. Keep a short log of each check so you can compare wear across seasons.
A photo-eye sensor that’s been knocked out of alignment is the most common cause we see. It’s usually a garden tool, trash can, or bicycle that nudged one sensor. Wipe the lenses, realign them until both lights are steady, and retest. If the door still reverses, call (833) 391-2958 for an exact quote; estimates are free.
Yes, lubricating rollers, hinges, and pivot points is a safe homeowner task with the door at rest. Use a garage door or silicone spray, not WD-40, and leave the tracks dry and wiped clean. Never lubricate anything under tension like springs or cables. If a roller is flat or wobbling, that’s a replacement and a call.
Check them by eye only: look for frayed strands, kinks, rust, or a cable that’s come off its drum. If you see any of those, call for service on the same day and stop using the door. Cables are under high tension and can snap without warning, so this is never a watch-and-wait item.
Not always, but it’s a signal. A squeal usually means dry rollers and hinges, which a quick lubrication fixes. A grinding or scraping sound often means a roller is flat or a track is out of line. A heavy groan on lift points to a spring or balance issue, and that’s a call. In Columbia’s humid air, noise tends to show up faster than in drier climates.
We work on eight of the most widely installed door and opener brands, including Clopay and Amarr doors and LiftMaster, Chamberlain, Genie, and Craftsman openers, so there’s less chance of a “we don’t work on that” dead end. We cover the door hardware, the springs, the tracks, and the opener electronics under one contact. Call (833) 391-2958 for a free estimate in Columbia.
The Bottom Line
The best garage door maintenance checklist isn’t the most thorough one, it’s the one ranked for how doors actually fail in Columbia. Check sensors first, then rollers, seal, cables, springs, tracks, and opener settings. Keep the tension items (springs and cables) for a technician and handle the rest yourself with a light touch and the right spray. Four seasonal passes and a monthly reverse test will catch most problems early. And when something crosses the line from worn to dangerous, stop and call. Our technicians have up to 8 years of experience, and we’d rather tell you a door is fine than sell you a repair you don’t need.
If anything on this checklist looked off, call (833) 391-2958 for a free estimate. You’ll get a clear diagnosis before any work starts. Our Columbia team is ready when you are.
Written by the team at Clarity Garage Door Service.